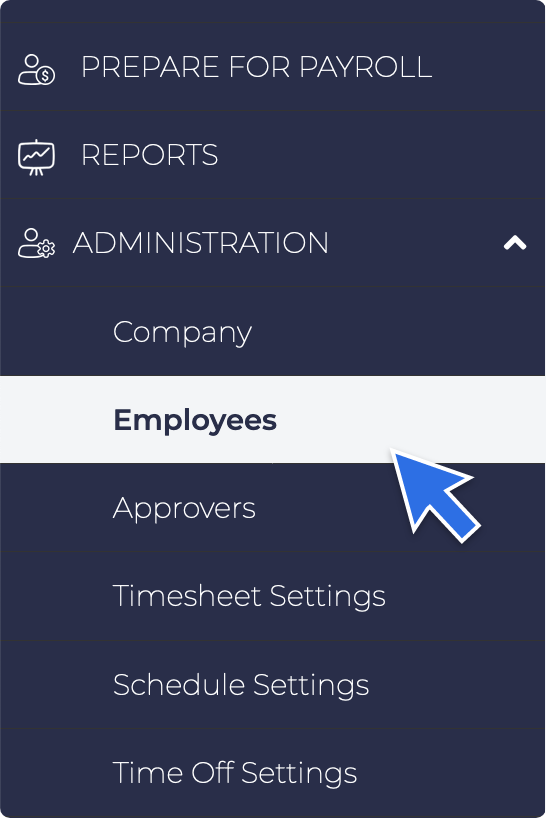
- When adding one or more employees, use the Employees section under the Administration Section in the navigation bar.
- Click the Add Employee button.

- An Add Employee window will pop up. Fill out all the information being asked, most importantly the required ones which are tagged with an asterisk.

- Once one, click Save.
- The Admin will be routed to the Employee Profile Page. Under the Profile Section are:
- Personal Info
- Contact Info
- Employment Info
- Compensation Info

- The Admin will automatically be routed to the Contact Info section. Fill out all the contact information needed. Then click Continue in the bottom right corner of the screen.
- Then admin will be routed to the Employment Info section. Fill out all the necessary information most especially the ones with an asterisk.
- If the employee to be added is a Supervisor, under the Supervisor Information segment Click Yes for the question Is this Employee a supervisor? Should the employee be under a supervisor regardless of being a supervisor him/herself, choose the name of its supervisor from the Who is this Employee's supervisor dropdown. Should there have been preloaded Supervisor in the system, the name of the supervisor should be shown as an option from the dropdown.
- Once done, click Continue.
- Admin will be routed to the Compensation Info Section. Fill out all the information needed, then click Continue.
- After completing the Compensation Info Section, the Account Information section will appear below the Compensation Info. Click the Send Registration Email link once done with the whole set-up or when you are ready to give the employee access to their account.
- After completing the Profile Section, Click the Time and Attendance beside it.
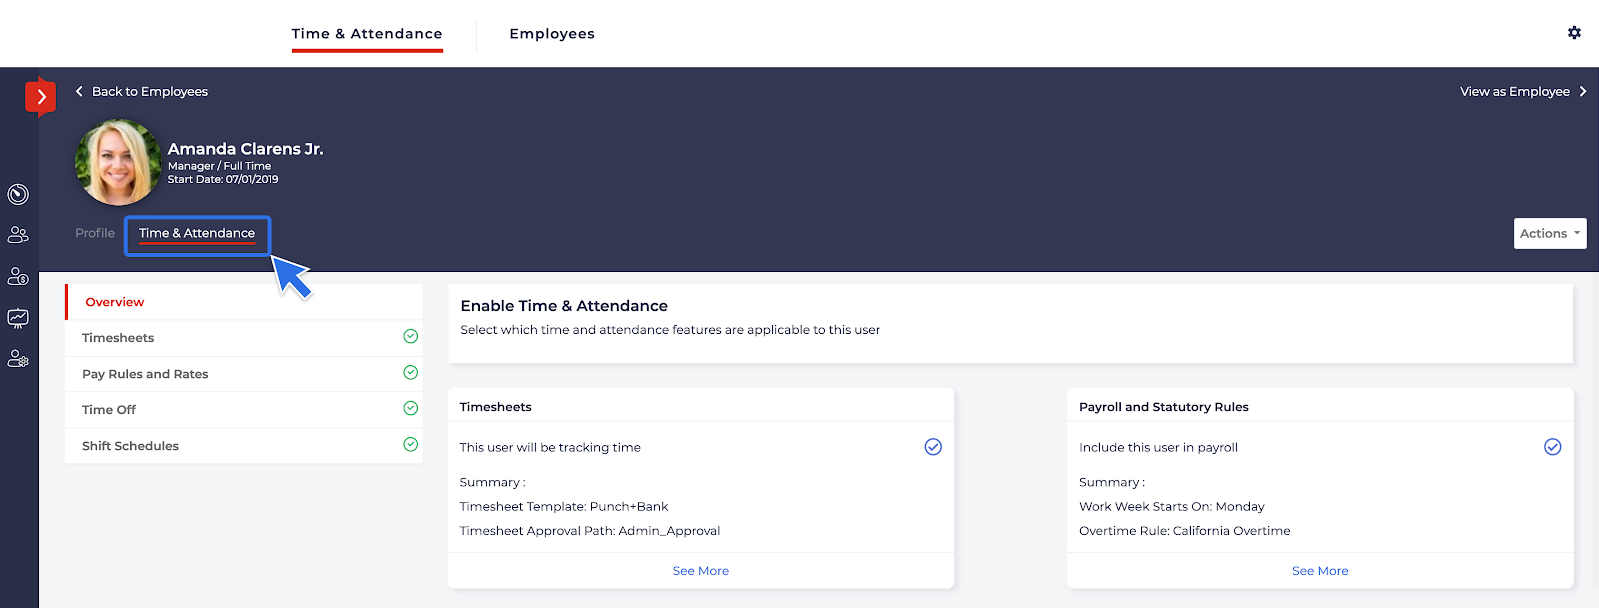
- Fill out all sections under the overview that has an exclamation point beside it.
- Go into Timesheets section. Fill out all the necessary information for each item along with their respective effective dates. Effective Date can be the date today or a specific date when the chosen setting is supposed to take into effect. Then click Save.
- If the employee will punching in and out using an iPad, click the Enable PIN Code to generate the employee’s PIN to be able to register and or punch in using the iPad.
- If there has been saved jobs and breaks in the system, click the Assign Job and Assign Breaks and choose the job and breaks to be assigned to the employee being added. Should there be none, go to the Pay Rules and Rates section.
- Fill out all information by choosing their respective settings from the dropdown and assigning their effective dates. Then click Save.
- Should there be any rate for specific jobs, go to the Job Based Pay Rates segment and click Assign New Job Specific Pay Rate link.
- A new window will pop-up fill out all necessary information then click save.
- Once done, go to Time Off section.
- Fill out all necessary information in the Time Off segment by choosing the respective setting from the drop-downs and assigning their effective date.
- Assign applicable time-off policies by clicking the Assign New Time Off Policy link and choosing their respective time-off policies.
- Choose the schedule type under the Time Off Balance Settings segment and all other required information. Once done, click Save.
- Lastly, go to the Shift Schedule segment and answer all required information.
Not allowed
How to Add an Employee
Not Allowed