This page will provide you with instructions for how to set up Open Enrollment (OE) for your employees. Once OE is set up, the system will automatically trigger an open enrollment period for all employees based on the OE date. For new hires, newly eligible, or for a QLE window for a specific employee, you will need to manually open that window for that employee. To set up a new Open Enrollment, or if you wish to view or edit any past OE, go to Benefits – Open Enrollment. 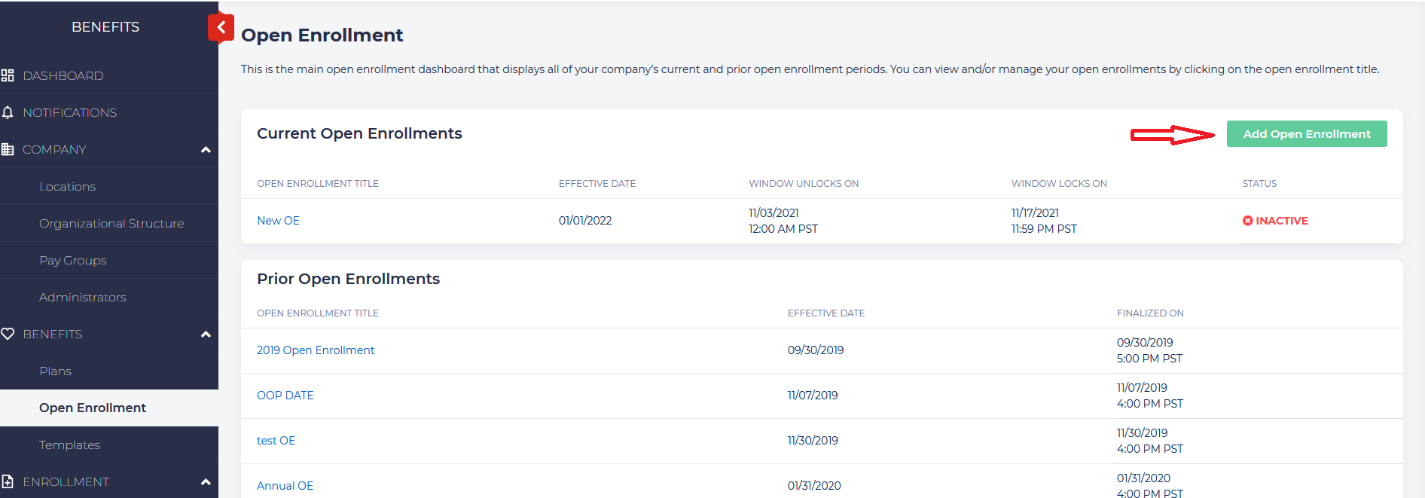 Click on the Add Open Enrollment button. You will see a screen that looks like this:
 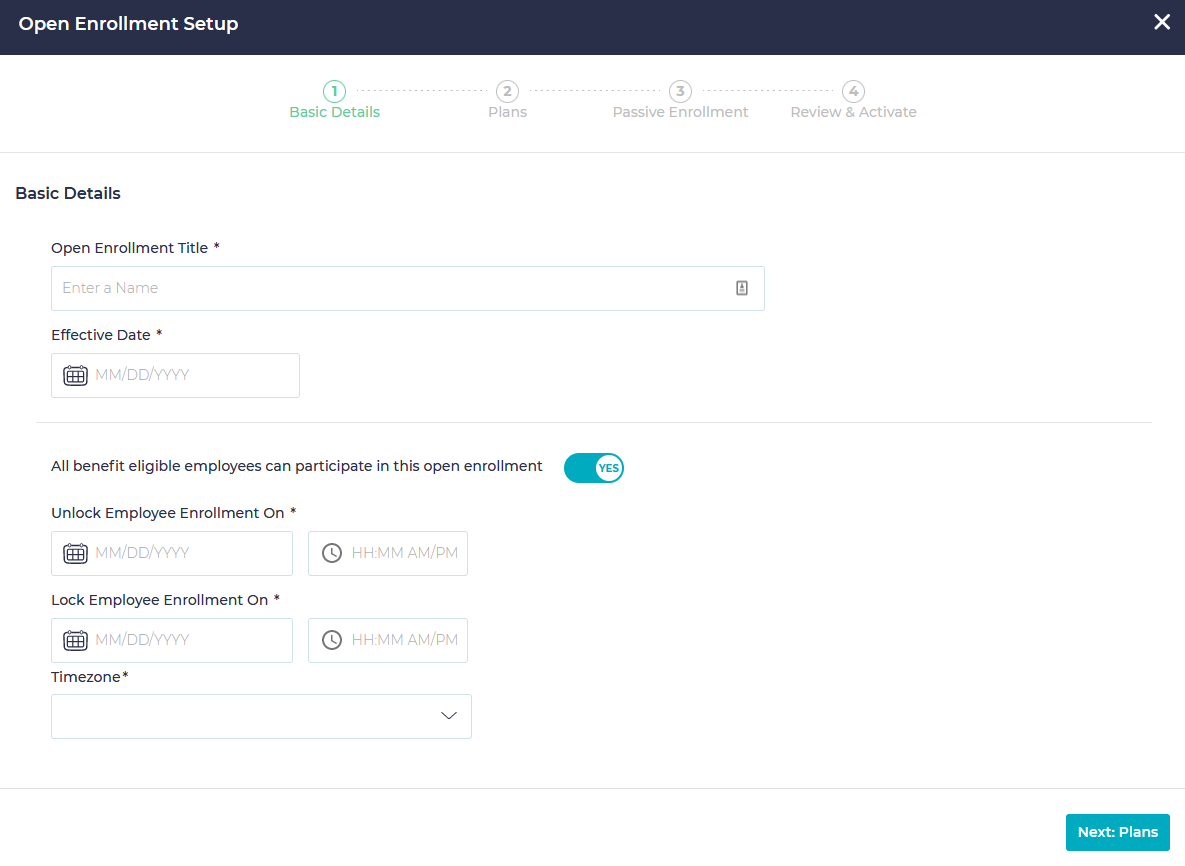 Enter the Open Enrollment Title and the effective date for when the open enrollment will begin. Choose whether all eligible employees can participate in this enrollment. If you choose “No,” set the conditions by which employees can participate, and choose the reason from the drop-down. For instance, if you want to limit enrollment to those who have been employed for a certain amount of time, you can choose Length of Employment below:
  You may choose any number of conditions for this process. For example, if you only want to allow non-smokers to be able to enroll, you may choose tobacco status:
  Below this, set the dates for which you wish to unlock employee enrollment, the time of day, and the time zone. You will also need to set the end time for enrollment to lock. Click on “Next” at the bottom of the screen to choose the plans for which you wish to open enrollment. If you wish to open enrollment for all plans on this date, you can select the checkbox on the upper left of the screen:
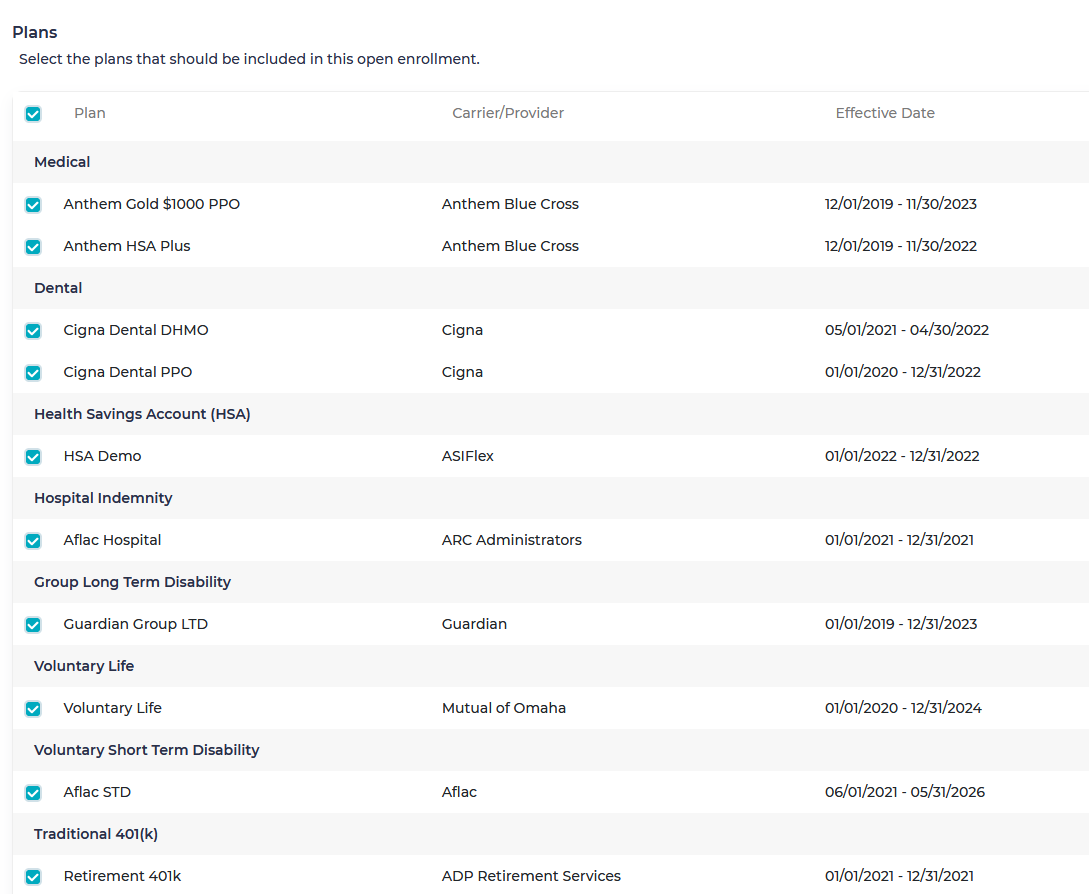 If you are editing an already active Open Enrollment to add additional plans, you will be presented two new questions at the bottom of this page. You may choose whether you want to unset enrollment for employees who have already submitted their elections, and if you wish to notify employees about new plans that have been added to their options.
 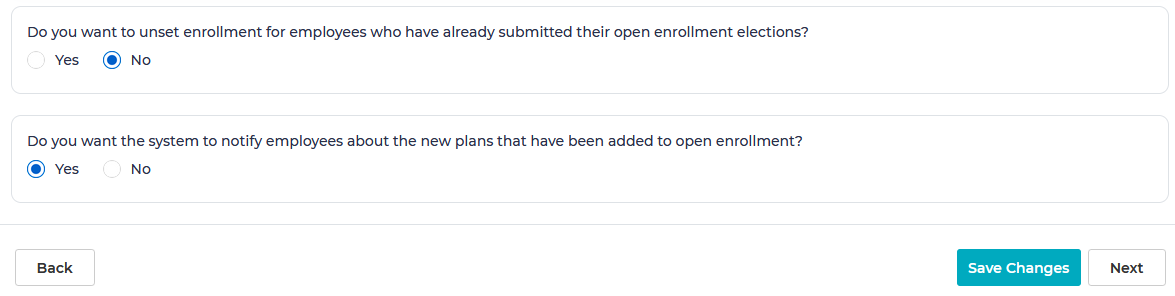 Save your changes and click Next. On the next page, you can review plans that have been set up for Passive Enrollment. If this is enabled, employees will be able retain their existing enrollments without making any changes. However, If there are any plans that have been enabled, employees can actively login and change their elections during this enrollment period.
 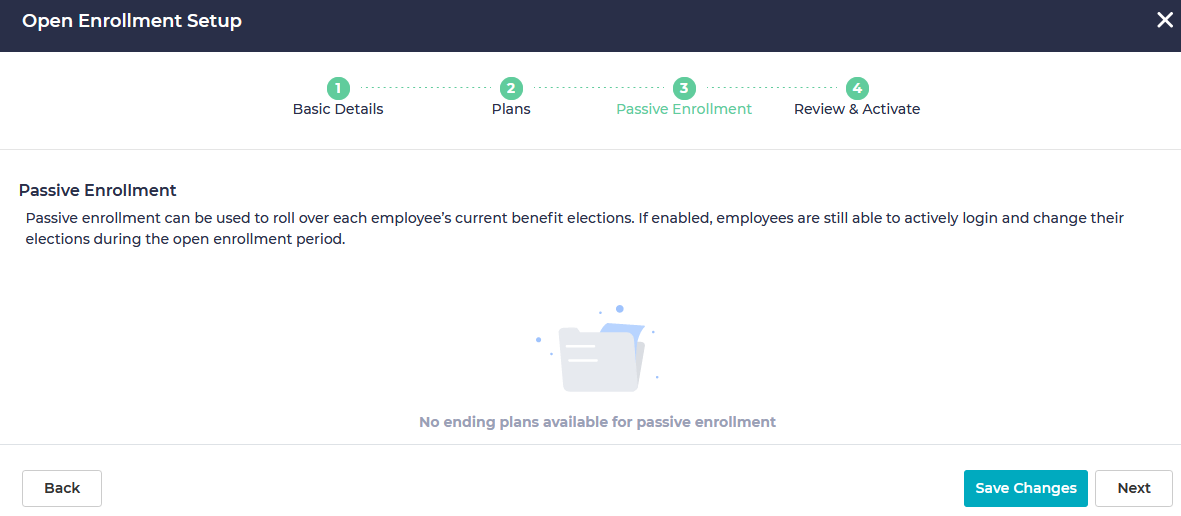 On the final screen, you will be able review the basic details about enrollment. If you need to make changes, you can click on the Back button to edit the necessary screens. If everything is good, click on Save & Activate.
 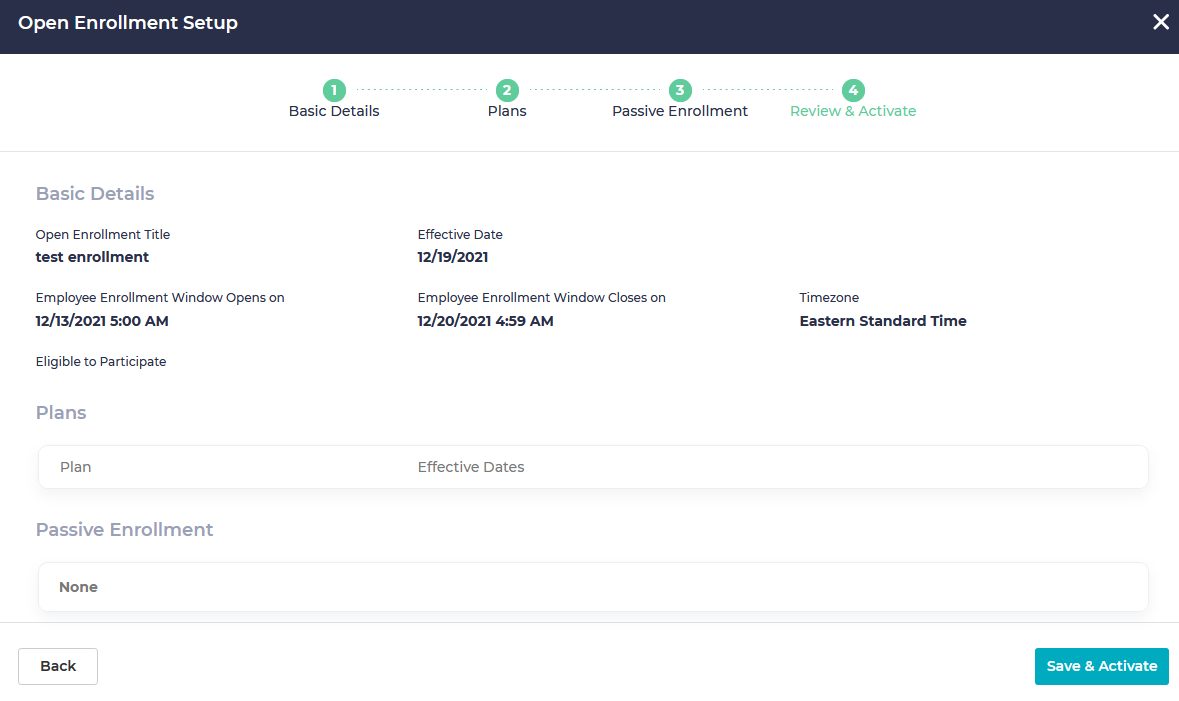 On the next screen you will be able to view details about the current enrollment you have just set up. You will be able to see a broad overview of this enrollment from the subsequent dashboard, including the numbers of employees who have completed the enrollment, are in progress, or who have not started. If everyone has participated and is complete during the enrollment period, you can finalize your results early.
 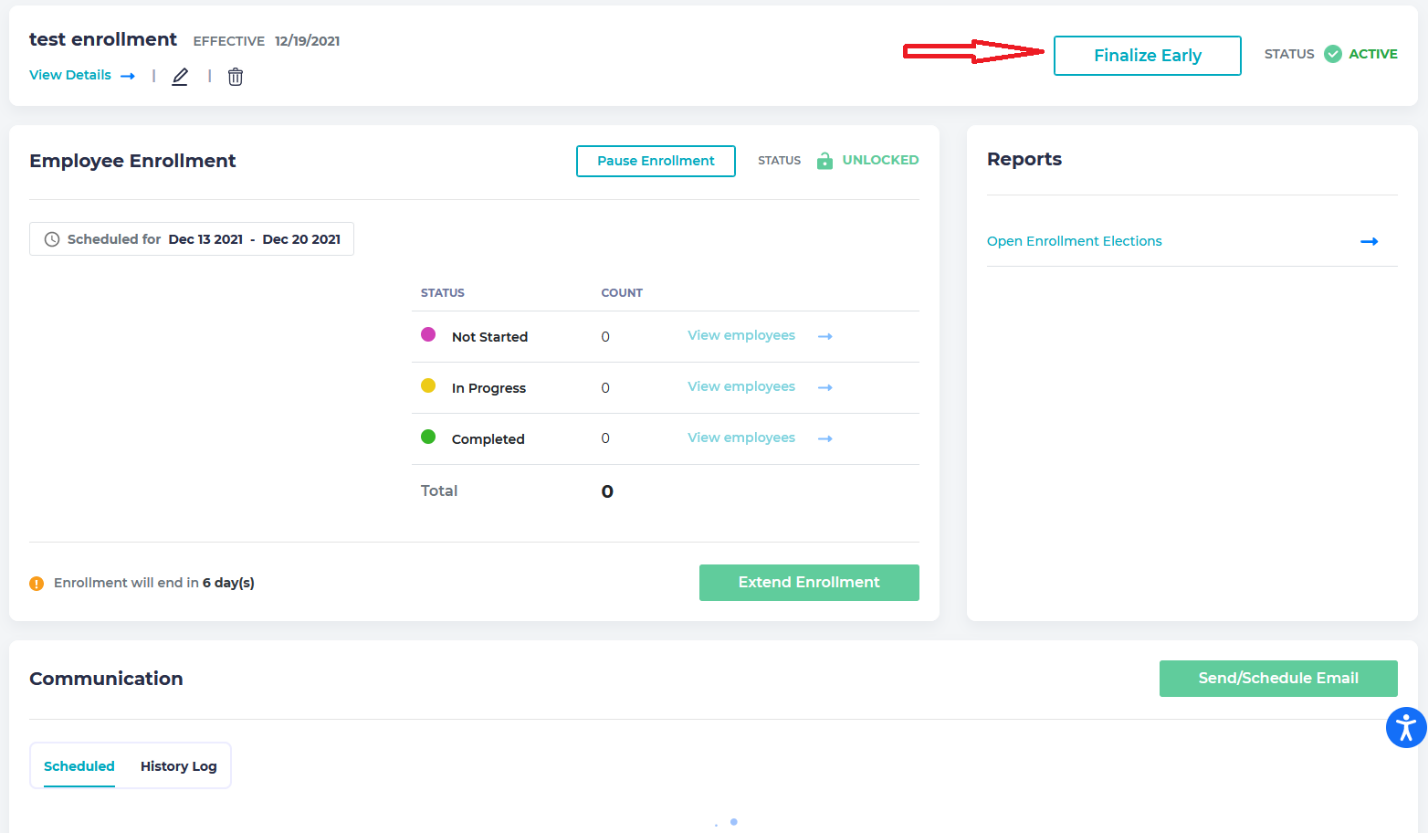 From this page, you can also send or schedule an email to employees regarding the open enrollment to remind them to complete the process, or to notify those who have completed it. You may create an email from scratch or use an existing template to customize it to your employees.
 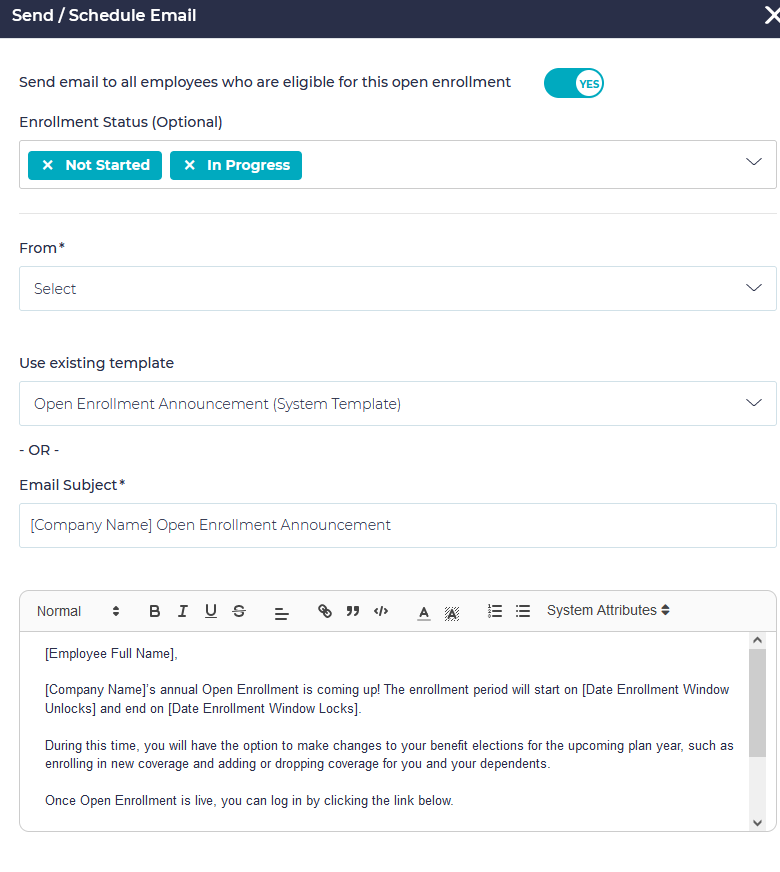 You may also attach files, save the existing email as a template for future use, and/or schedule the time and date you wish to have the message sent.
 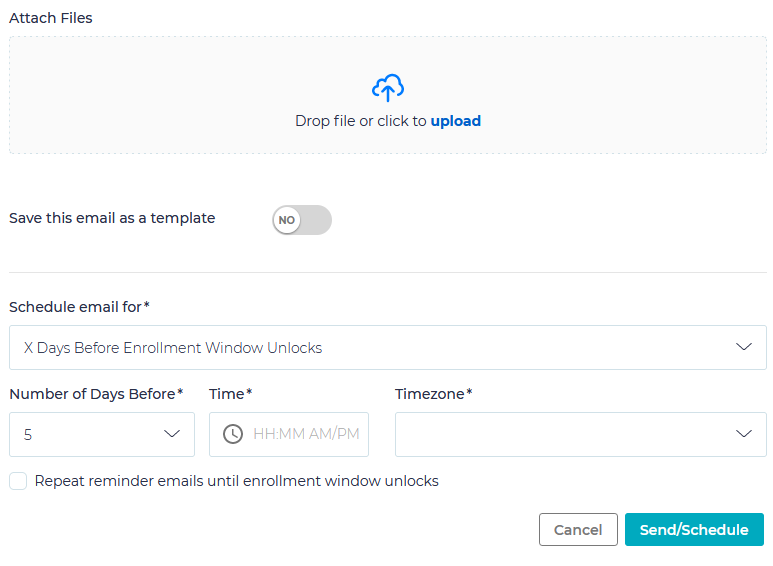 You may also directly access the Open Enrollment Elections report from this page. From the main enrollment page, you may access your enrollment at any time while it is active to make any necessary changes, by clicking on the title:
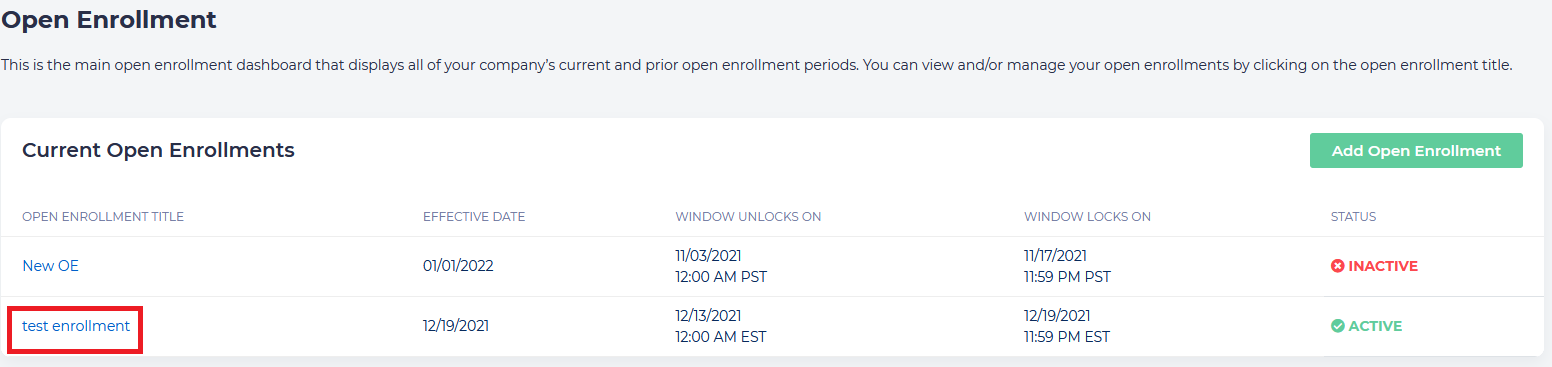
Not allowed
How to Set Up Open Enrollment
Not Allowed